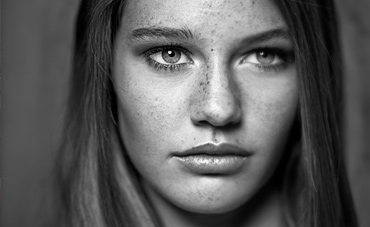
This video tutorial is all about sharpening. Here I’ll be taking an in-depth look at what sharpening is and how it works, the various tools that every retoucher should know, as well as some tips on how best to use them and when.
The specific sharpening tools that we will cover include:
- Unsharp-Mask
- Smart Sharpening
- Camera Shake Removal in Photoshop CC
- Multiple high pass filter sharpening methods
- Frequency separation based sharpening
Most of the tools are available in Photoshop CS3 and onward with the exception of the Camera Shake Removal tool which is in Photoshop CC only. Do note however that sharpening tool like Unsharp Mask and Smart Sharpen have improved gradually in their output quality from version to version.
Here is a written reference on some of the values that I use and go over the video:
Unsharp Mask
Used primarily for output sharpening when preparing images for the web or print. At a max image width or height of 2048:
Amount: 200-400% Radius: 0.1 – 0.2 Threshold: 5-20
As mentioned in the video, I generally don’t recommend sharpening with Unsharp Mask during your editing workflow, but on a 36MP image my settings would be:
Amount: 40-100% Radius: 0.4 – 1 Threshold: 5-20
A general rule of thumb in both cases is to decrease radius while increasing amount and vice versa. Once I’m done, I’ll usually back off my sharpened layer opacity to 70%. Be sure to check out the bonus tip at the end of the video for a useful trick with Unsharp Mask!
Smart Sharpening
With the release of the improved Smart Sharpen filter in Photoshop CC, it has become my tool of choice for output sharpening. At a max image width or height of 2048:
Amount: 200-400% Radius: 0.2 – 0.3 Remove: Gaussian Blur
Amount: 100-200% Radius: 0.1 Remove: Lens Blur
As with Unsharp Mask, I don’t often use Smart Sharpen during my editing workflow, but on a 36MP image my settings are:
Amount: 40-100% Radius: 0.5 – 1 Remove: Gaussian Blur or Lens Blur
Again, once applied, I’ll usually back off my sharpened layer opacity to 70%.
High Pass and Frequency Separation Sharpening
Both high pass sharpening and frequency separation sharpening work in a similar fashion, but as explained in the video, frequency separation sharpening produces better results. In the high pass approach the radius is set in the actual high pass filter, while in the frequency separation approach it is set in the Gaussian blur tool, but in general the values are the same for both. In a 36MP image I typically use the following:
Radius: 0.5 – 1.5 Layer Blend Mode: Vivid Light or Hard Light
Radius: 8 – 15 Layer Blend Mode: Soft Light or Overlay
Radius: 100 Layer Blend Mode: Soft Light
In all cases, lower your sharpening layer’s opacity to 30%-50%. To translate to your camera’s mega-pixel value, just take a fraction of the value that corresponds to your mega-pixel count vs. mine. For example, a 12MP camera is 1/3 of 36mp so just divide the above radius values by 3. If you had 18MP, divide by 2, etc.
Thanks for watching and don’t forget to subscribe to my YouTube channel for more updates!


